THEOS提供了iphone/preference_bundle_modern工具,可以为插件添加设置项,该设置项会被打包成bundle并和tweak插件合并打包到deb文件中
创建preference bundle 先进入我们tweak插件的目录,然后通过nic.pl创建preference_bundle_modern
1
2
3
4
5
6
7
8
9
10
11
12
13
14
15
16
17
18
19
20
21
22
$ nic.pl NIC 2.0 - New Instance Creator ------------------------------ [1.] iphone/activator_event [2.] iphone/application_modern [3.] iphone/application_swift [4.] iphone/flipswitch_switch [5.] iphone/framework [6.] iphone/library [7.] iphone/preference_bundle_modern [8.] iphone/tool [9.] iphone/tool_swift [10.] iphone/tweak [11.] iphone/xpc_service Choose a Template (required): 7 Project Name (required): testprereference Package Name [com.yourcompany.testprereference]: com.bomo.testprereference Author/Maintainer Name [bomo]: [iphone/preference_bundle_modern] Class name prefix (three or more characters unique to this project) [XXX]: BM Instantiating iphone/preference_bundle_modern in testprereference/... Adding 'testprereference' as an aggregate subproject in Theos makefile 'Makefile' . Done.
生成下面testprereference文件夹
1
2
3
4
5
6
7
8
9
10
11
12
- control - Makefile - Tweak.x - tweaktest - testprereference | - Resources | - Info.plist | - Root.plist 配置设置页面Root页面(从entry.plist进入) | - entry.plist 定义在设置页面的入口按钮和文字 | - Makefile | - BMRootListController.h | - BMRootListController.m Root页面绑定的控制器,可以在这里实现action事件
图标处理 图标放在Resources目录下大小为29*29,可以使用2/3倍图
1
2
3
4
5
testprereference | - Resources | - icon.png | - icon@2x.png | - icon@3x.png
entry.plist 我们看一下设置入口配置的定义entry.plist
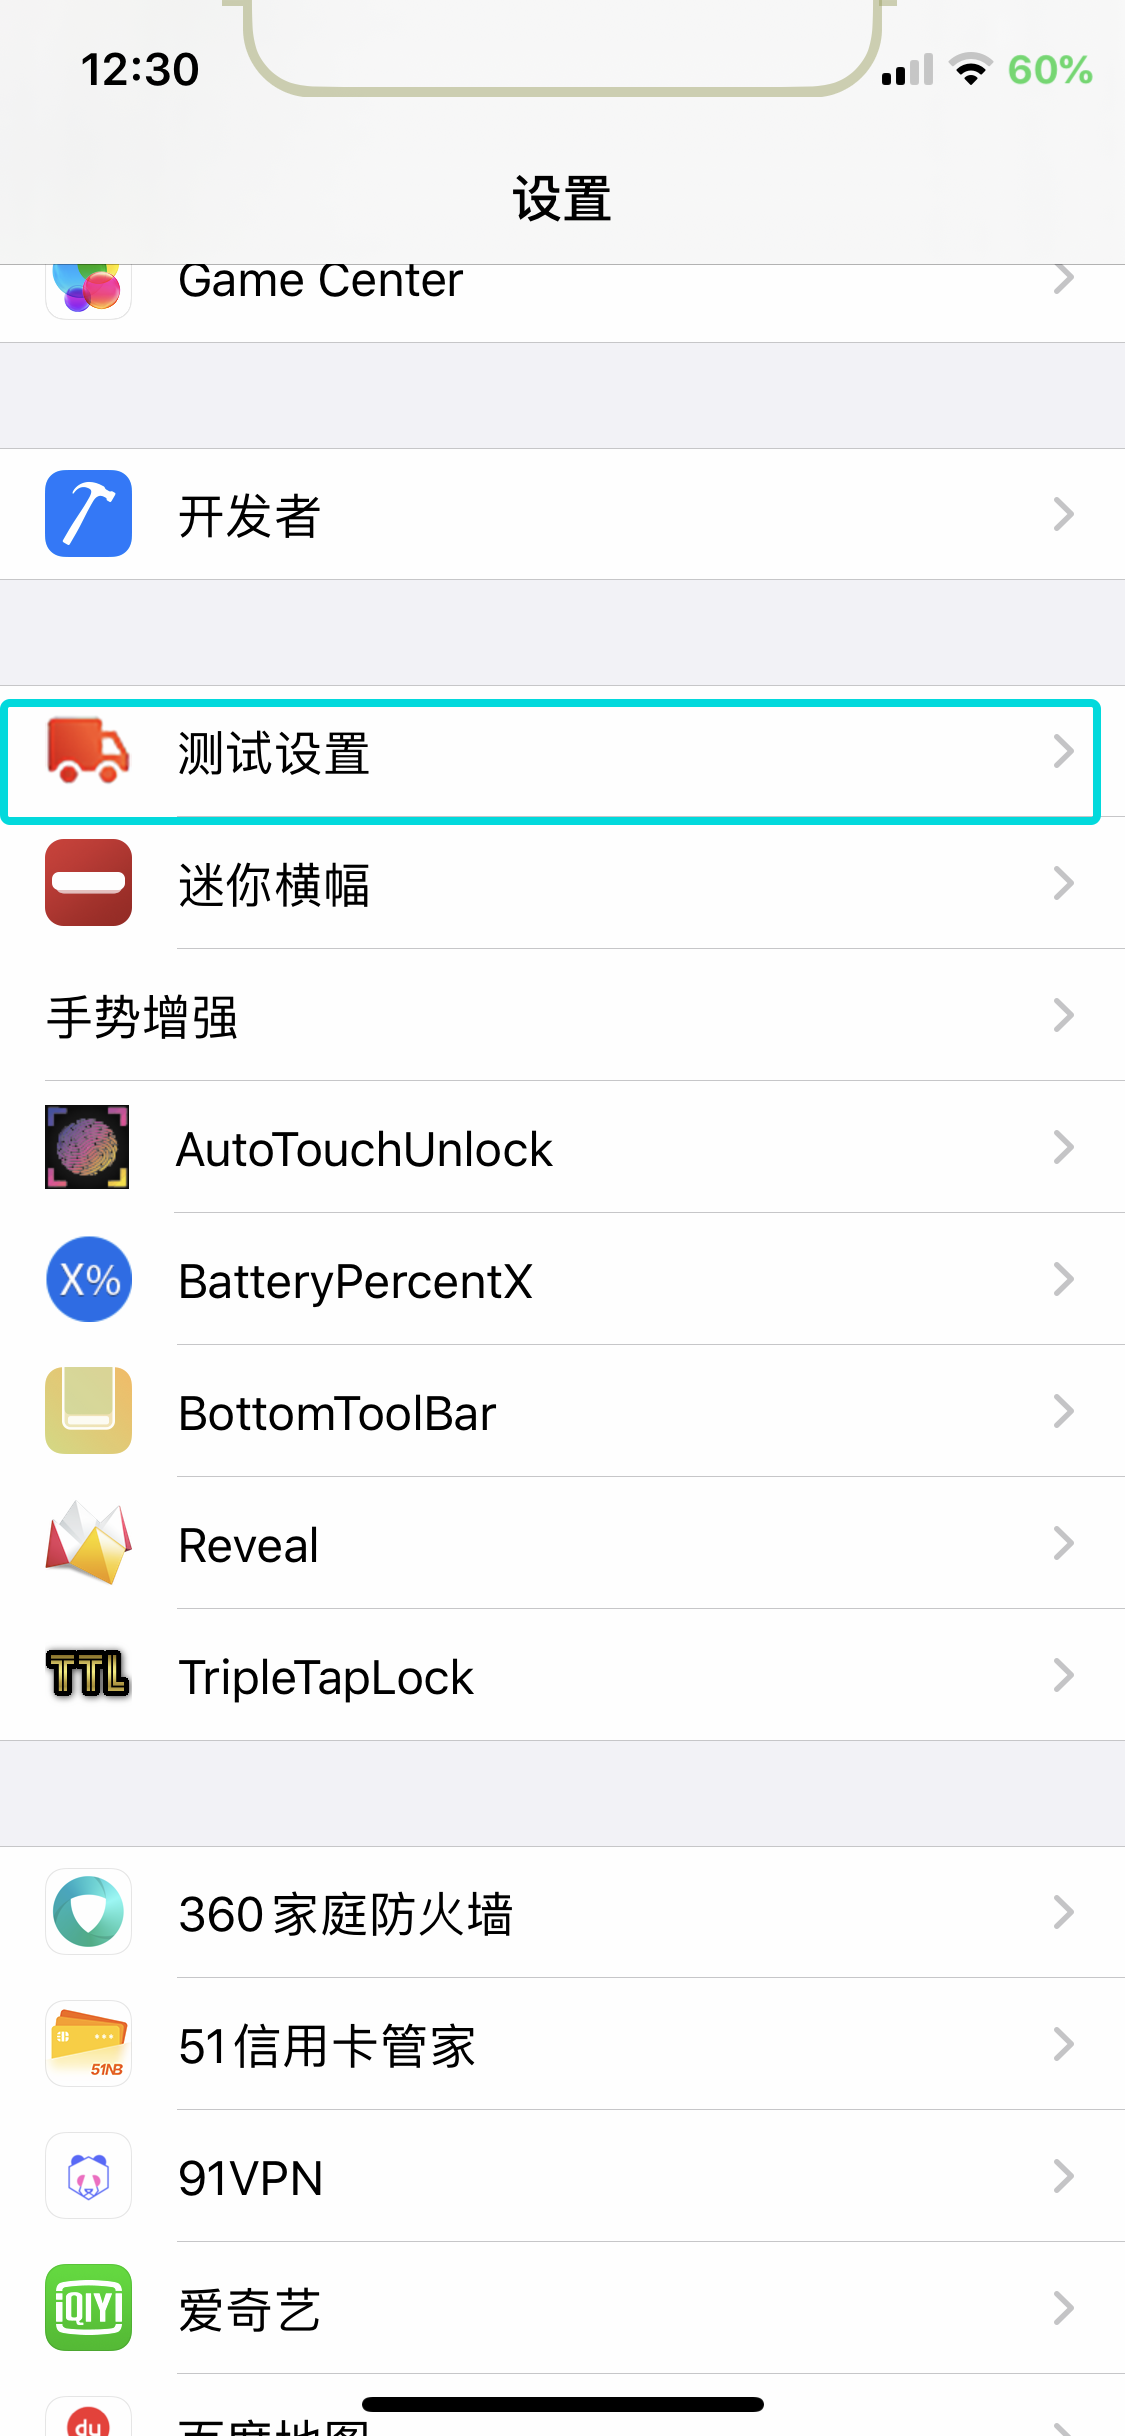
1
2
3
4
5
6
7
8
9
10
11
12
13
14
15
16
17
18
19
20
21
22
23
24
25
26
<?xml version="1.0" encoding="UTF-8" ?> <!DOCTYPE plist PUBLIC "-//Apple//DTD PLIST 1.0//EN" "http://www.apple.com/DTDs/PropertyList-1.0.dtd" > <plist version ="1.0" > <dict > <key > entry</key > <dict > <key > bundle</key > <string > testprereference</string > <key > cell</key > <string > PSLinkCell</string > <key > detail</key > <string > BMRootListController</string > <key > icon</key > <string > icon.png</string > <key > isController</key > <true /> <key > label</key > <string > 测试设置</string > </dict > </dict > </plist >
编译后可以打开设置.app可以看到该项,如上图,接下来我们配置设置主页面Root.plist
Root.plist 定义设置主页面的内容
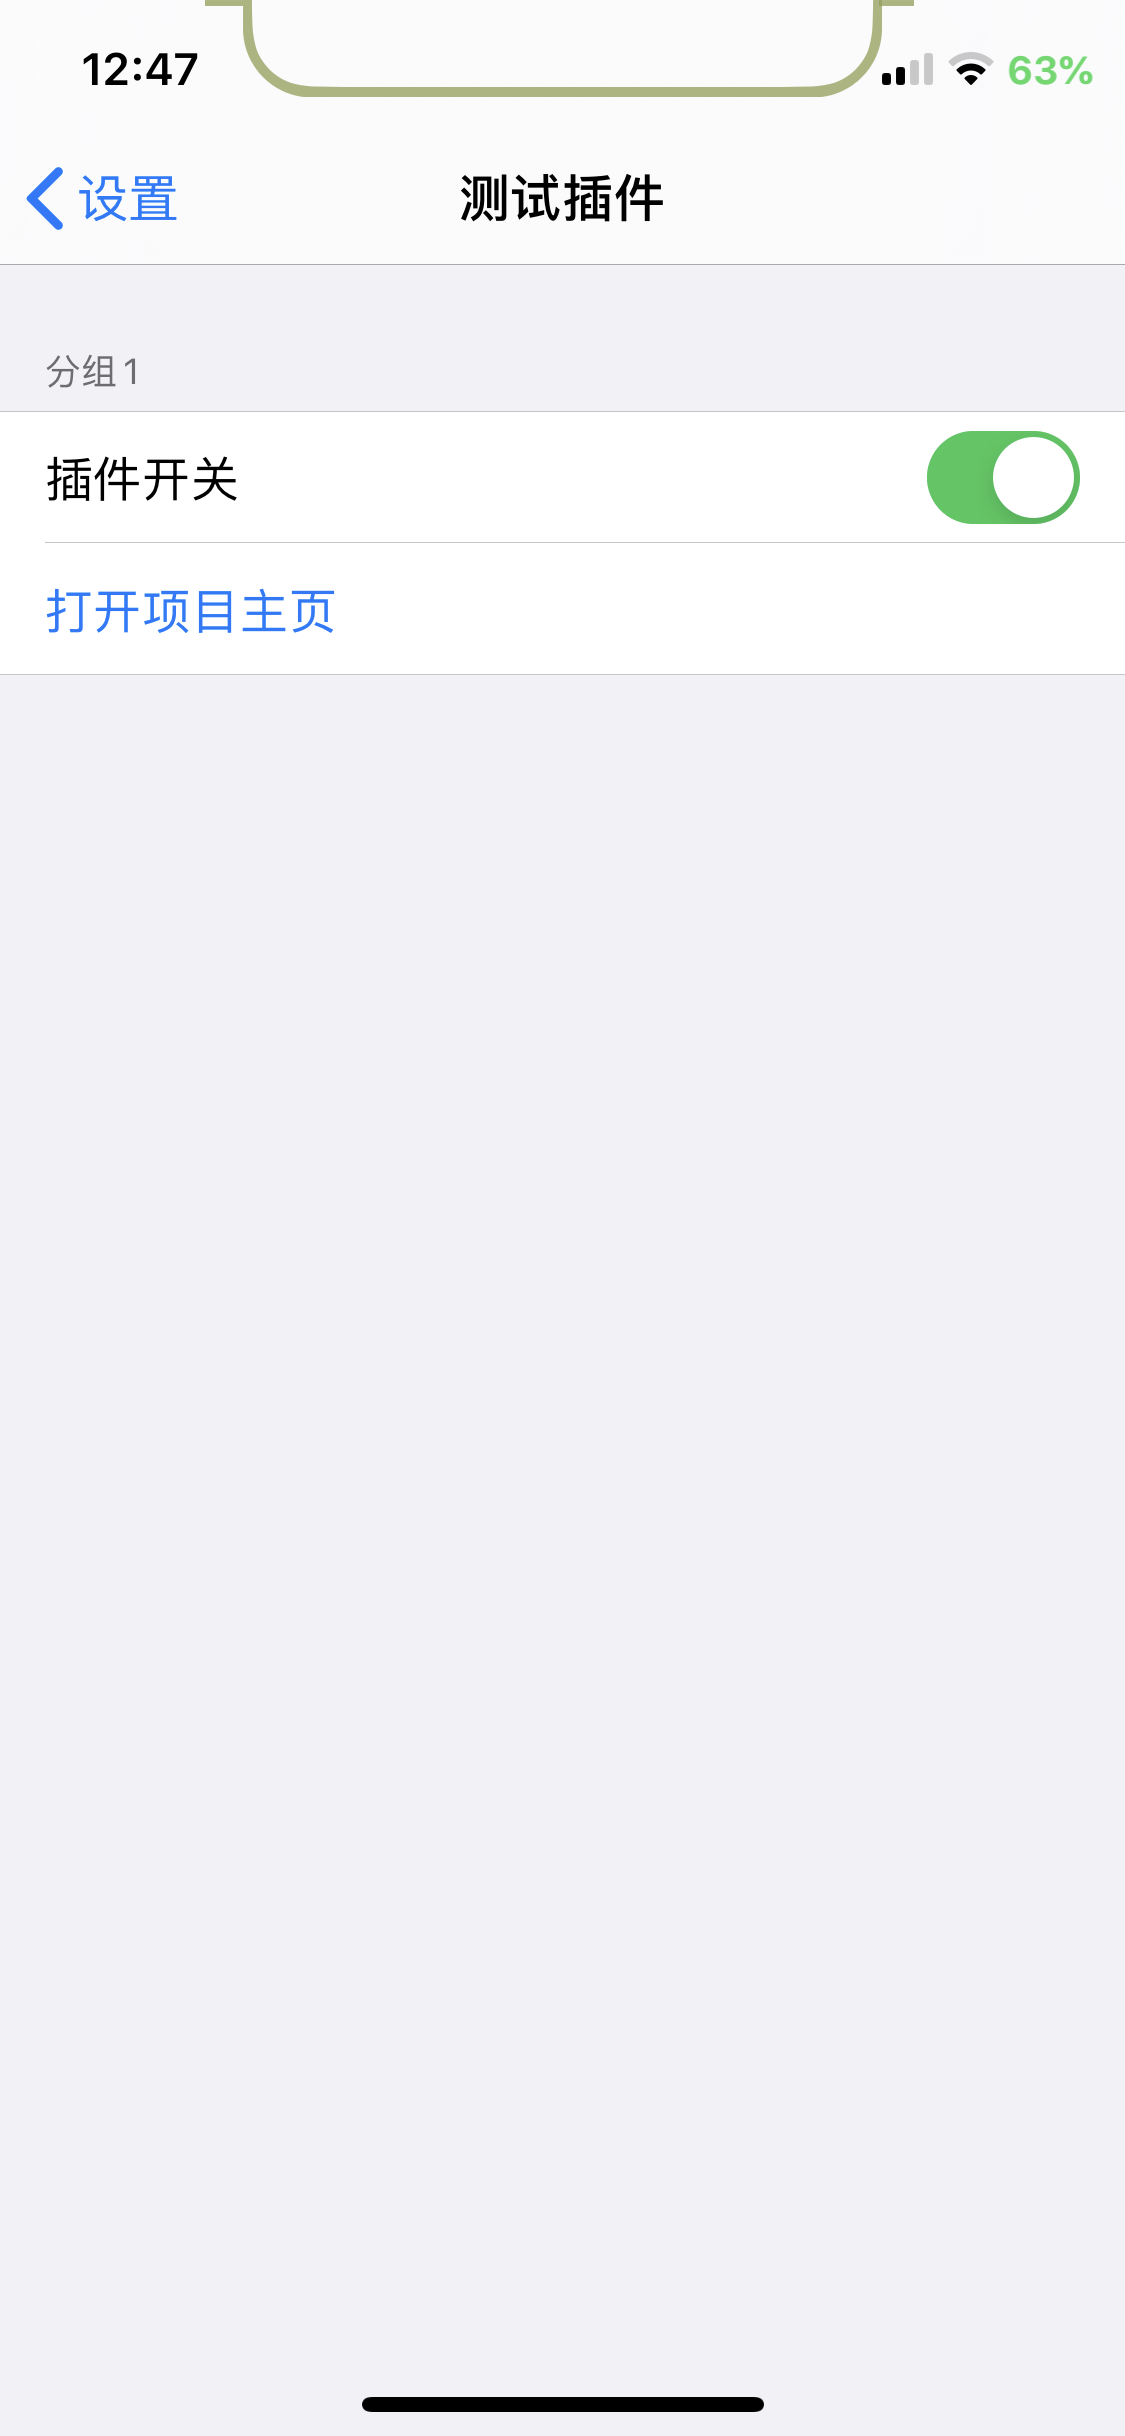
1
2
3
4
5
6
7
8
9
10
11
12
13
14
15
16
17
18
19
20
21
22
23
24
25
26
27
28
29
30
31
32
33
34
35
36
37
38
39
40
41
42
43
44
45
46
47
48
49
50
51
<?xml version="1.0" encoding="UTF-8" ?> <!DOCTYPE plist PUBLIC "-//Apple//DTD PLIST 1.0//EN" "http://www.apple.com/DTDs/PropertyList-1.0.dtd" > <plist version ="1.0" > <dict > <key > items</key > <array > <dict > <key > cell</key > <string > PSGroupCell</string > <key > label</key > <string > 分组1</string > </dict > <dict > <key > cell</key > <string > PSSwitchCell</string > <key > default</key > <true /> <key > defaults</key > <string > com.bomo.testprereference</string > <key > key</key > <string > testpreferenceMainSwitch</string > <key > label</key > <string > 插件开关</string > <key > PostNotification</key > <string > com.bomo.testprereference/reloadSettings</string > </dict > <dict > <key > cell</key > <string > PSButtonCell</string > <key > action</key > <string > openHomePage</string > <key > isDestructive</key > <true /> <key > label</key > <string > 打开项目主页</string > </dict > </array > <key > title</key > <string > 测试插件</string > </dict > </plist >
编译后可以查看效果
RootListController 关联的controllerBMRootListController实现PSButtonCell绑定的action
1
2
3
4
5
6
7
8
9
10
@implementation BMRootListController - (void )openHomePage { NSURL *url = [NSURL URLWithString:@"https://blog.bombox.org" ]; [UIApplication .sharedApplication openURL:url options:@{} completionHandler:nil ]; } @end
读取配置 在Root.plist里面,对于每一个设置项,这里
其中有两个属性
defaults:设置UserDefault关联的bundleId
key:设置关联UserDefaults的key,例如PSSwitchCell开关变化的时候,会把值保存到plist文件里面
如上面的设置
1 2 3 4 5 6 <key > defaults</key > <string > com.bomo.testprereference</string > <key > key</key > <string > testpreferenceMainSwitch</string >
我们可以NSUserDefault在bundle的程序中读取(如:BMRootListController)
1
2
3
4
5
6
NSString *bundleId = @"com.bomo.testprereference" ;NSString *switchStatusKey = @"testpreferenceMainSwitch" ;NSDictionary *bundleDefaults = [[NSUserDefaults standardUserDefaults] persistentDomainForName:bundleId];BOOL isSwitchOn = [[bundleDefaults objectForKey:switchStatusKey] boolValue];NSLog (@"%@" , @(isSwitchOn));
在Tweak项目中无法使用NSUserDefault的方式读取配置,我们的配置会被保存在/var/mobile/Library/Preferences/{bundle_id}.plist,我们在tweak插件中,可以通过该文件读取到设置的值,但不要代码中写入值
1
2
3
4
5
NSString *bundleId = @"com.bomo.testprereference" ;NSString *plistPath = [NSString stringWithFormat:@"/var/mobile/Library/Preferences/%@.plist" , bundleId];NSDictionary *settings = [[NSDictionary alloc] initWithContentsOfFile:plistPath];BOOL isOn = [settings[@"testpreferenceMainSwitch" ] boolValue];
监听设置变化 通过下面方法监听系统通知
1
2
3
4
5
6
CFNotificationCenterAddObserver (CFNotificationCenterGetDarwinNotifyCenter (), NULL , reloadSettings, CFSTR ("com.bomo.testprereference/reloadSettings" ), NULL , CFNotificationSuspensionBehaviorCoalesce );
通知的key在配置cell的时候定义(Root.plist)
1 2 3 4 5 6 7 8 9 <dict > <key > cell</key > <string > PSSwitchCell</string > ... <key > PostNotification</key > <string > com.bomo.testprereference/reloadSettings</string > </dict >
监听函数
1
2
3
static void reloadSettings(CFNotificationCenterRef center, void *observer, CFStringRef name, const void *object, CFDictionaryRef userInfo) { }
安装 插件编译打包后,preferencebundle会被编译成bundle放到deb里面,PreferenceLoaders是MobileSubstrate其中的一个工具,可以把tweak扩展PreferenceBundles注入到iOS的设置中
入口文件entry.plist会被装到/Library/PreferenceLoader/Preferences
我们编译好的preference bundle(可执行文件和资源)会被安装到/Library/PreferenceBundles下面
而配置数据文件{bundle_id}.plist,会被存放在/var/mobile/Library/Preferences/目录下
在编译的时候可能会报下面问题
1
2
ld: warning: directory not found for option '-F/Applications/Xcode.app/Contents/Developer/Platforms/iPhoneOS.platform/Developer/SDKs/iPhoneOS13.4.sdk/System/Library/PrivateFrameworks' ld: framework not found Preferences
这是由于Preferences是私有库,我们可以从theos/sdkPreferences.framework/Applications/Xcode.app/Contents/Developer/Platforms/iPhoneOS.platform/Developer/SDKs/iPhoneOS.sdk/System/Library/PrivateFrameworks,这样就可以正常引用了
参考