0%

【iOS逆向】iOS动态库共享缓存

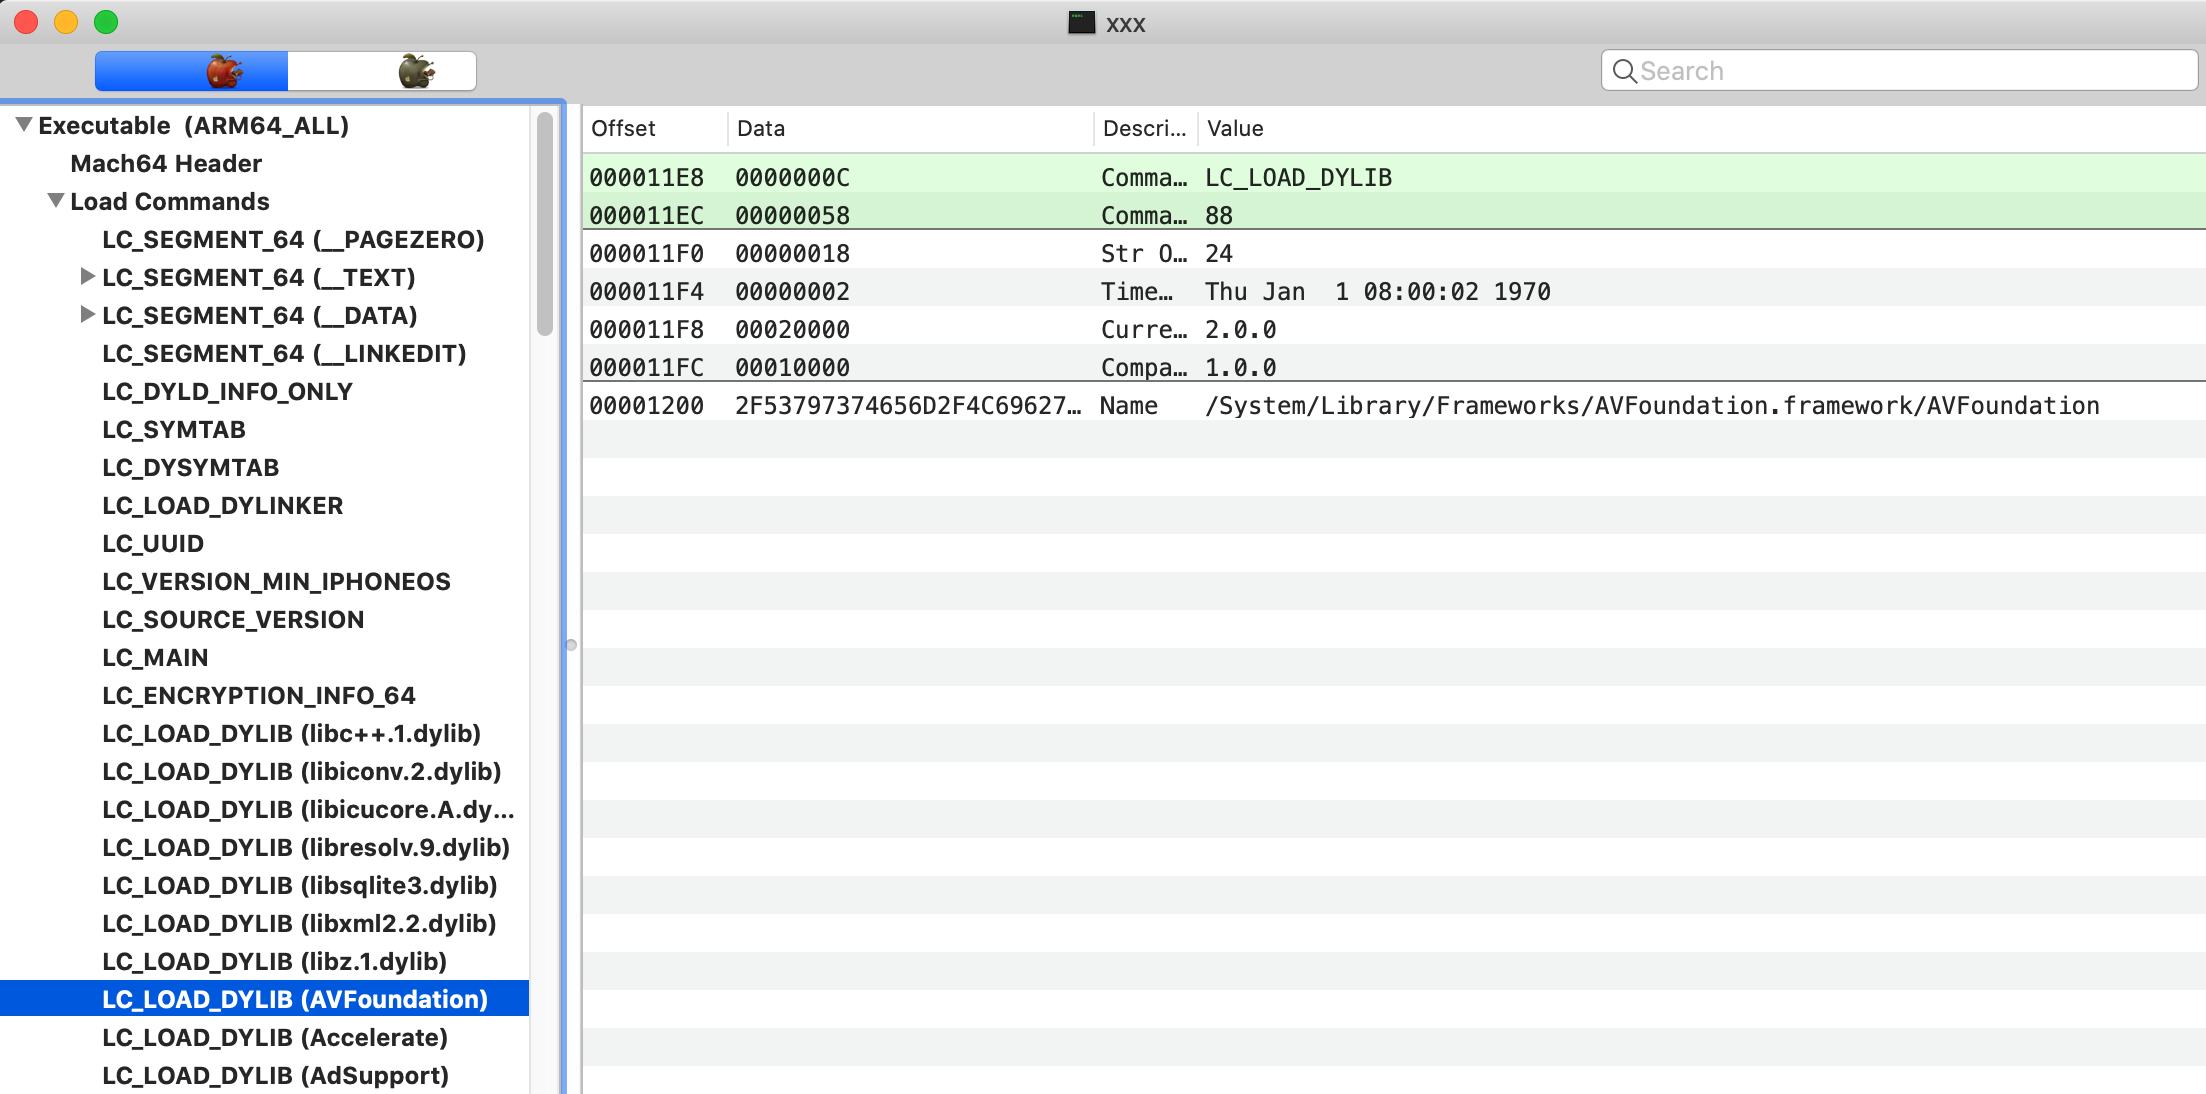
我们在开发的过程中,经常会用到系统自带的库,如 Foundation,UIKit 等,这些库存放在什么地方呢,我们可以用 MachOView查看编译好的文件的Load Command看到依赖的动态库的路径
macho-framework

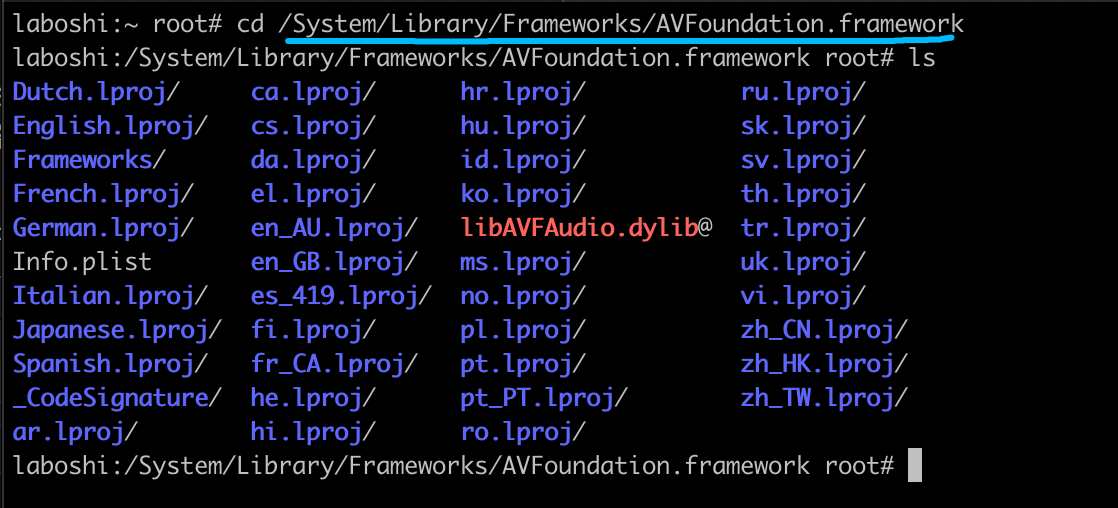
这里可以看到,动态库的路径为/System/Library/Frameworks/AVFoundation.framework/AVFoundation,我们连接到手机查看发现,framework 文件夹存在,但是并没有可执行文件
system-lib-path

动态库共享缓存

从iOS 3.1开始,为了提高系统的性能,所有的系统库文件都被打包合并成一个大的缓存文件中,而原来的动态库文件则被去除了,系统直接去缓存文件中加载动态库,该共享缓存文件保存在/System/Library/Caches/com.apple.dyld/目录下

dyld-cache-path

可以看到,该缓存库有1547MB,我们把共享库拷贝到本地

1
scp root@xx.xx.xx.xx:/System/Library/Caches/com.apple.dyld/dyld_shared_cache_arm64 ~/Desktop/dyld_shared_cache_arm64

我们通过工具dsc_extractor把系统库从共享缓存库分离出来,该工具也在dyld项目里面,在该项目中找到/launch-cache/dsc_extractor.cpp文件,我们需要自己编译一下,修改文件,只保留下面代码,其他删除

1
2
3
4
5
6
7
8
9
10
11
12
13
14
15
16
17
18
19
20
21
22
23
24
25
26
27
28
29
30
31
32
33
34
35
36
// #if 0
#if 1
// test program
#include <stdio.h>
#include <stddef.h>
#include <dlfcn.h>

typedef int (*extractor_proc)(const char* shared_cache_file_path, const char* extraction_root_path,
void (^progress)(unsigned current, unsigned total));

int main(int argc, const char* argv[])
{
if ( argc != 3 ) {
fprintf(stderr, "usage: dsc_extractor <path-to-cache-file> <path-to-device-dir>\n");
return 1;
}

//void* handle = dlopen("/Volumes/my/src/dyld/build/Debug/dsc_extractor.bundle", RTLD_LAZY);
void* handle = dlopen("/Applications/Xcode.app/Contents/Developer/Platforms/iPhoneOS.platform/usr/lib/dsc_extractor.bundle", RTLD_LAZY);
if ( handle == NULL ) {
fprintf(stderr, "dsc_extractor.bundle could not be loaded\n");
return 1;
}

extractor_proc proc = (extractor_proc)dlsym(handle, "dyld_shared_cache_extract_dylibs_progress");
if ( proc == NULL ) {
fprintf(stderr, "dsc_extractor.bundle did not have dyld_shared_cache_extract_dylibs_progress symbol\n");
return 1;
}

int result = (*proc)(argv[1], argv[2], ^(unsigned c, unsigned total) { printf("%d/%d\n", c, total); } );
fprintf(stderr, "dyld_shared_cache_extract_dylibs_progress() => %d\n", result);
return 0;
}

#endif

使用clang++编译该源文件

1
clang++ -o dsc_extractor dsc_extractor.cpp

编译后得到dsc_extractor,创建文件夹dyld_shared_cache,存放分离出来的动态库

1
./dsc_extractor dyld_shared_cache_arm64 dyld_shared_cache

dyld_shared_cache/System/Library/Frameworks可以看到动态缓存库中的所有合并的系统库,找到UIKit.framework/UIKit,这个就是真实的UIKit,但是只有8kb

uikit-file

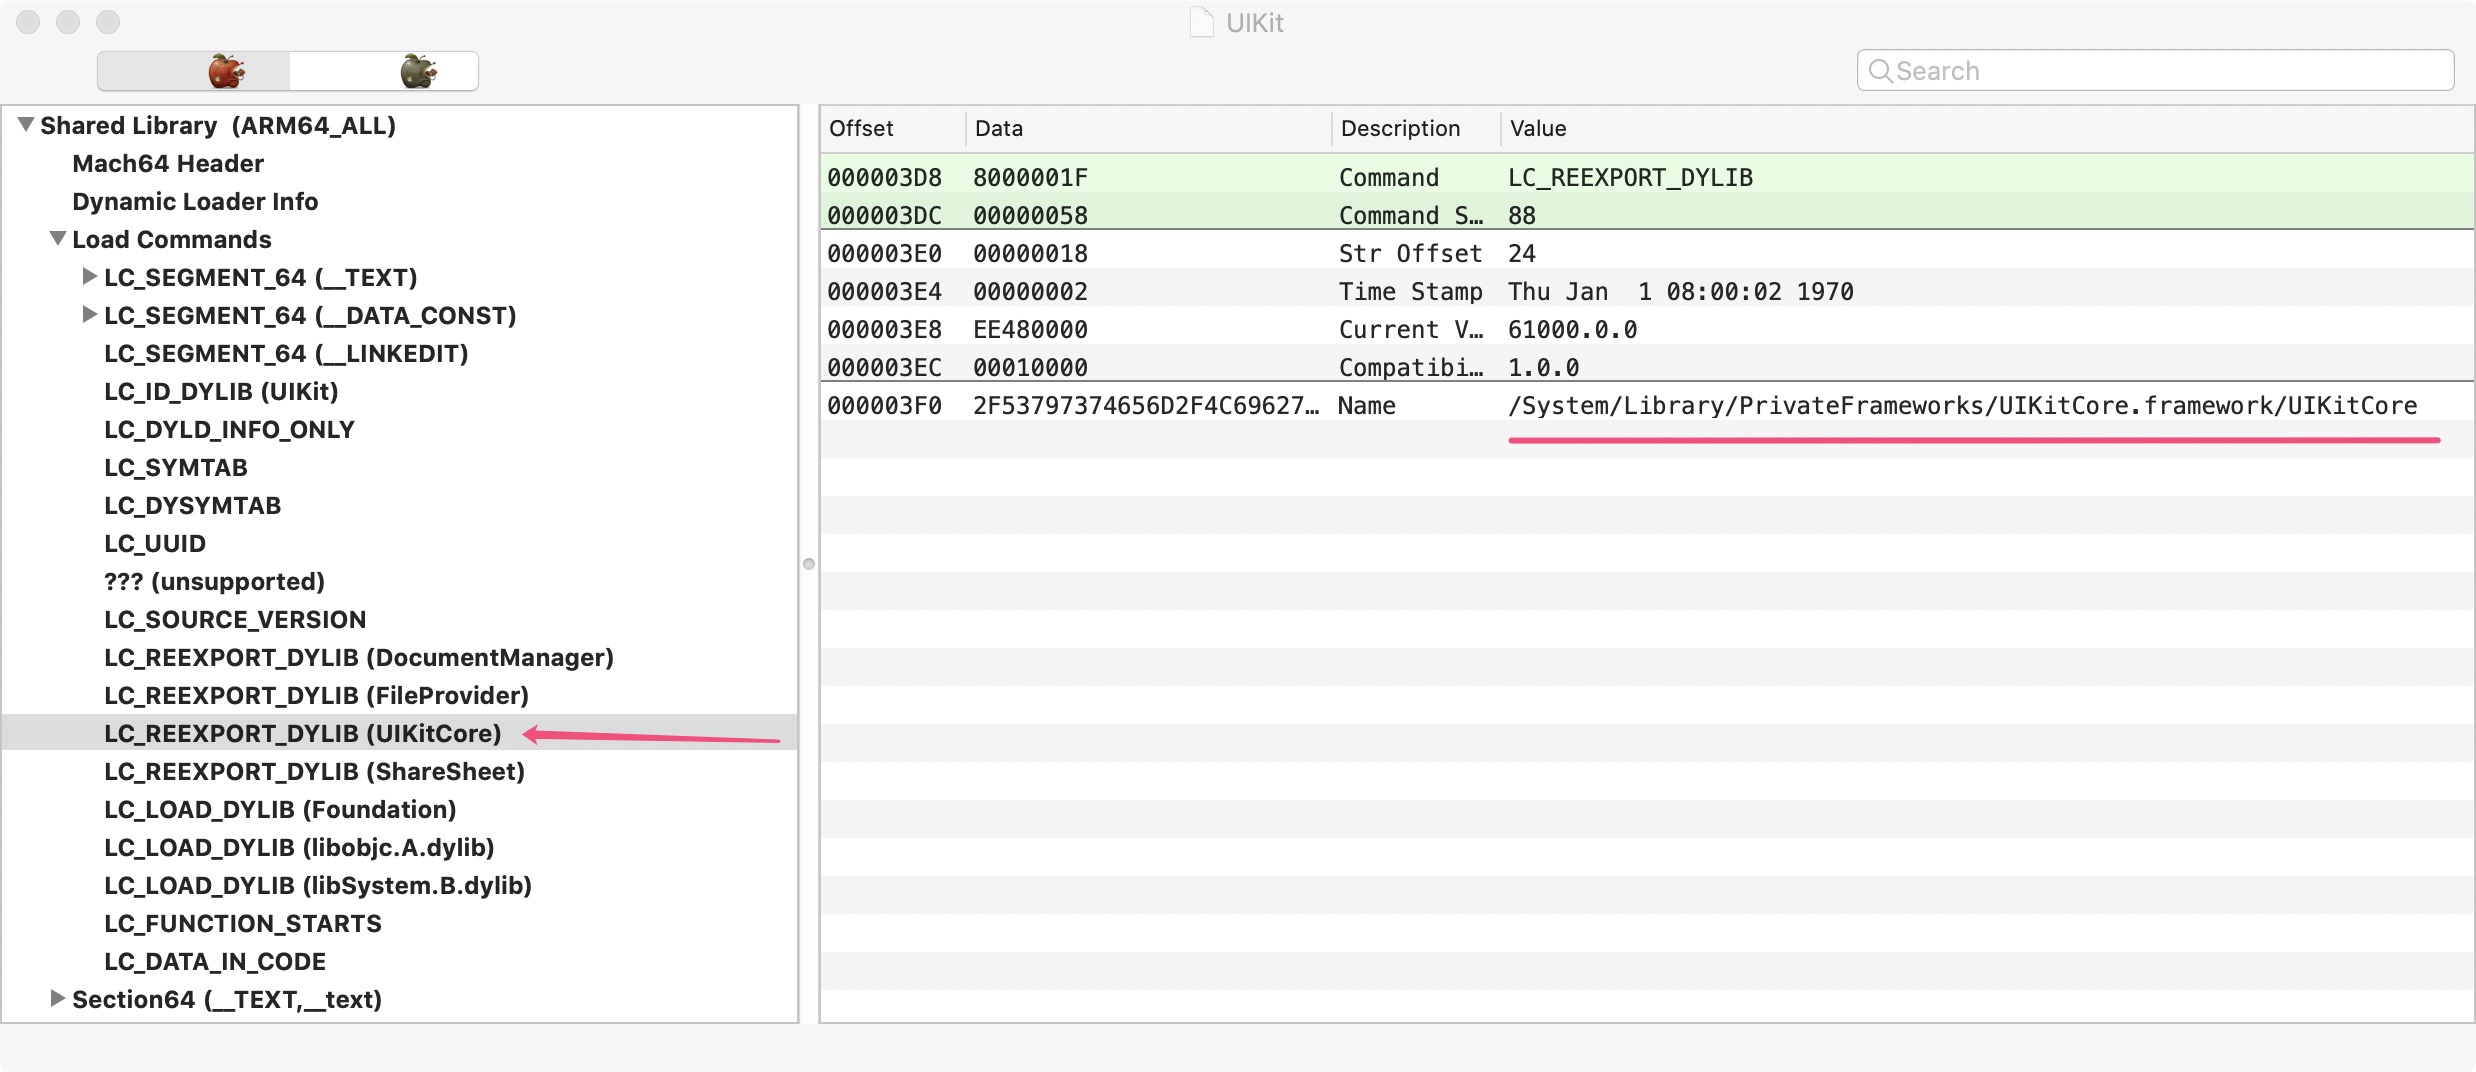
使用MachOView工具查看,可以看到,UIKit引用UIKitCore,核心代码在PrivateFrameworks/UIKitCore.framework/UIKitCore,有30MB
uikit-machoview

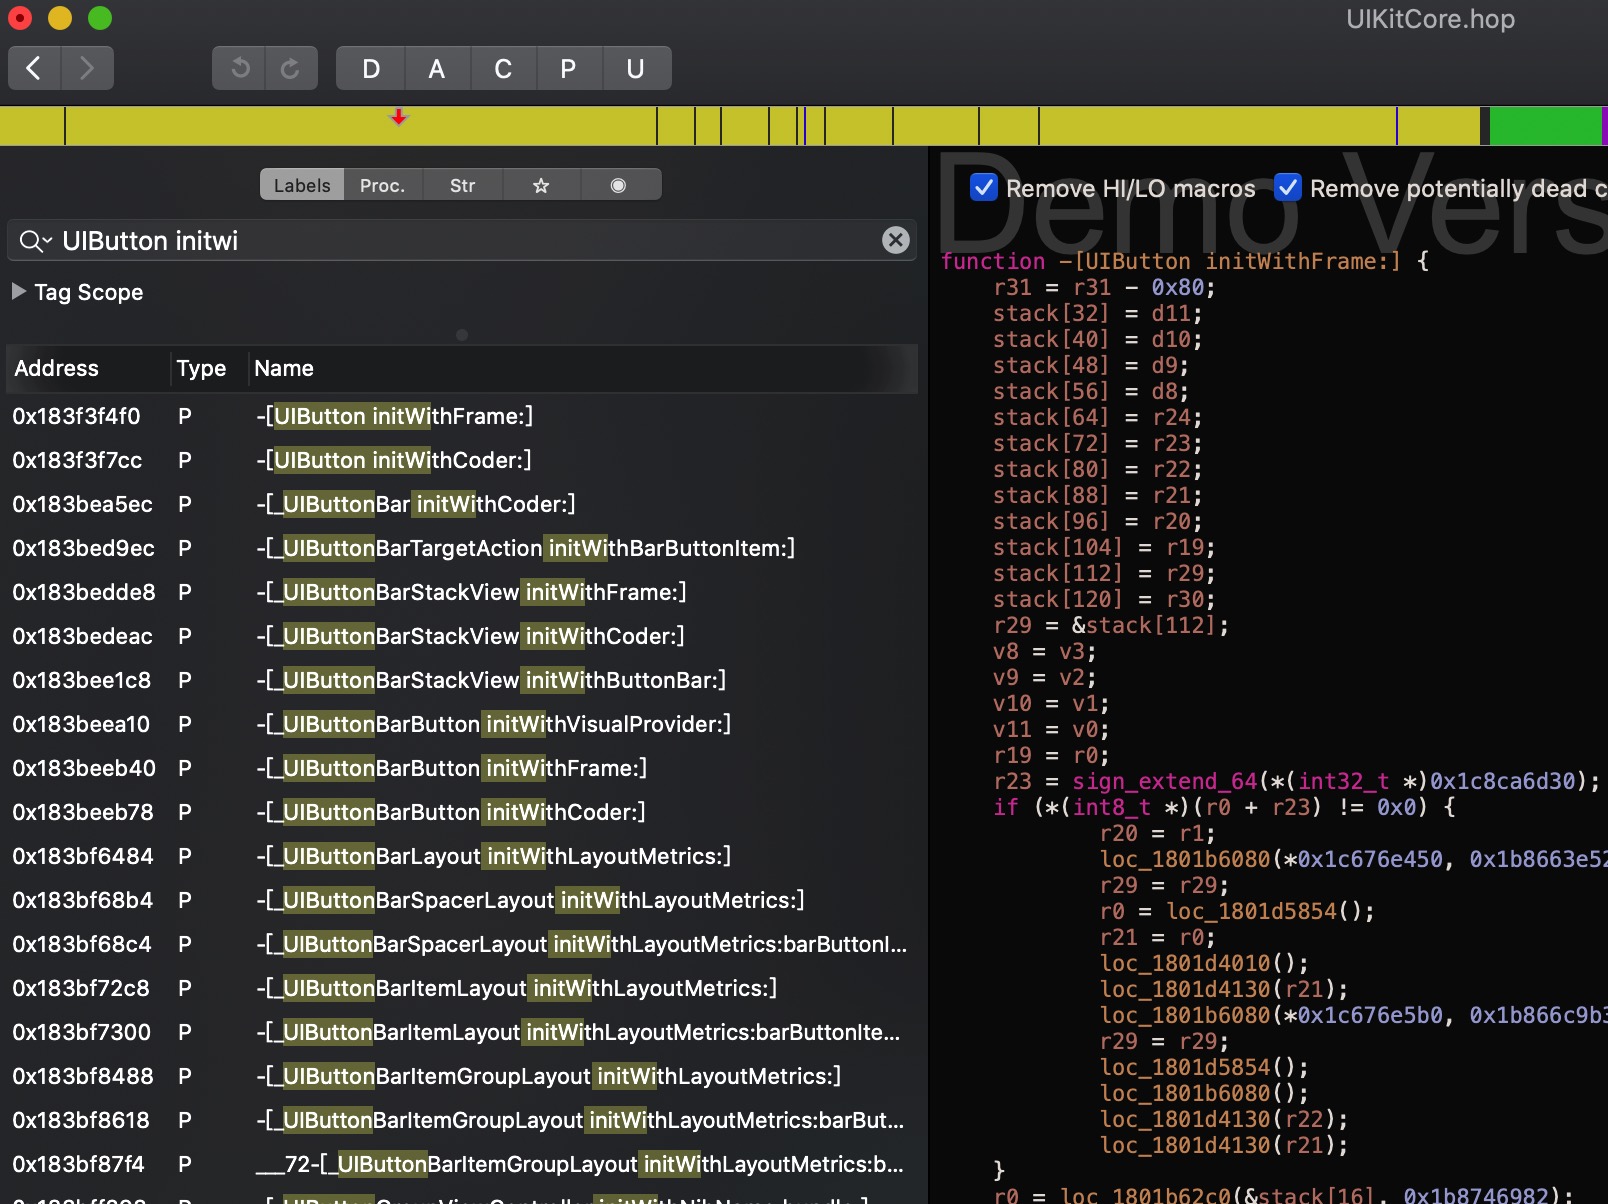
可以通过hopper分析系统库的代码

uikit-uibutton

动态库的加载

在Mac/iOS中,使用/usr/lib/dyld加载动态库,[NSBundle loadBundle]内部也是使用dyld

dyld加载过程可细分为九步:

  1. 设置运行环境:主要设置运行参数,环境变量,检查进程权限
    Product -> Scheme -> Edit Scheme -> Argument可以配置dyld参数,如: DYLD_PRINT_ENV
  2. 加载共享缓存:也就是dyld_shared_cache_arm64
  3. 实例化主程序:读取mach-o文件,加载链接库,segment等信息
  4. 加载插入的动态库DYLD_INSERT_LIBRARIES
  5. 链接主程序
  6. 链接插入的动态库
  7. 执行弱符号绑定
  8. 执行初始化方法。
  9. 查找入口点并返回。

引用

  1. dyld详解